2024. 2. 2. 14:39ㆍSKKU DT
유니티 UI -Slider 활용

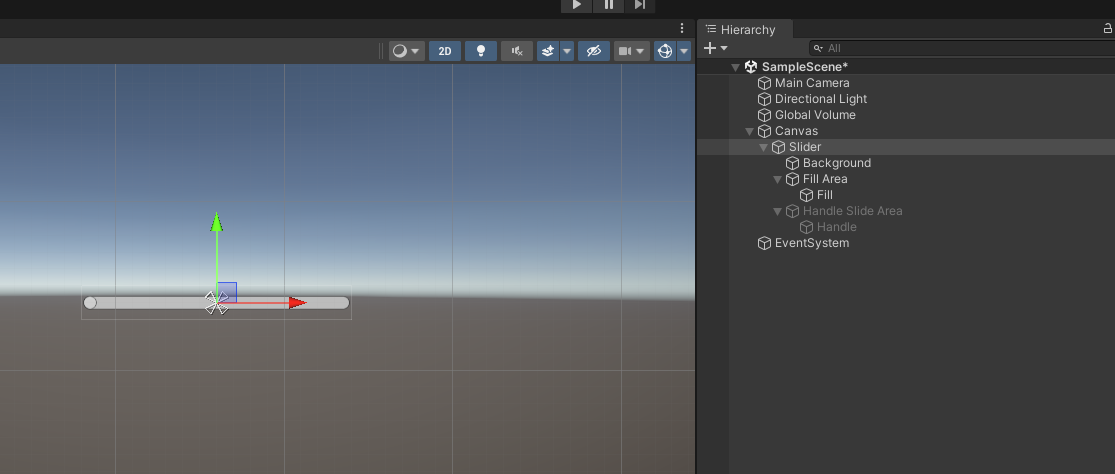
위의 예시 같은 UI를 만들어볼 것이다.
3D URP 프로젝트를 하나 만든다.
Slider를 하나 만든다. 음악에서 이퀄라이저 같은 모양을 만들 것이다.
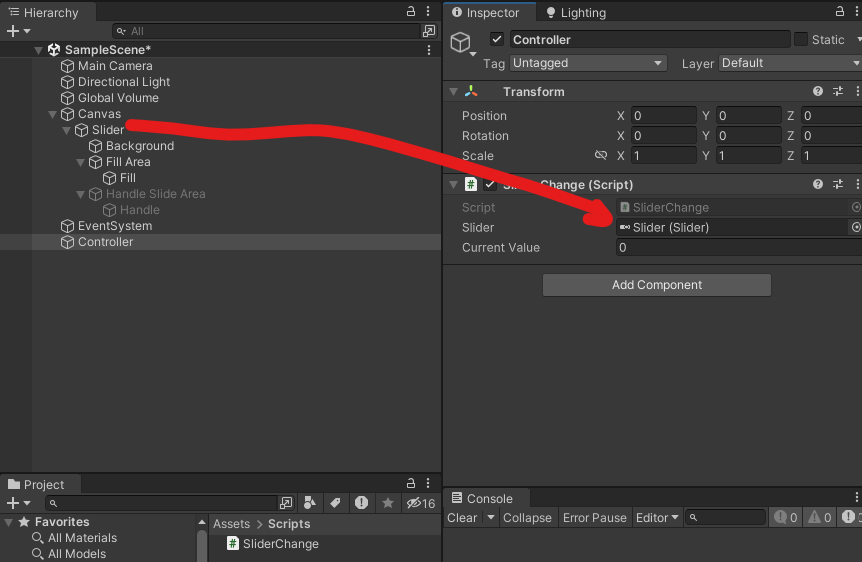
SliderChange 스크립트 생성
using System.Collections;
using System.Collections.Generic;
using UnityEngine;
using UnityEngine.UI;

public class SliderChange : MonoBehaviour
{
    public Slider slider;
    public float currentValue;
    void Start()
    {
        InvokeRepeating("RandomValue", 0.1f, 0.1f); //함수 이름, 1초마다 반복하고, 1초 뒤에 반복한다.
    }

    public void RandomValue()
    {
        currentValue = Random.Range(0.6f, 0.8f);
        slider.value = currentValue;
    }
}
잘 적용되었다면 아래와 같이 값이 움직인다.
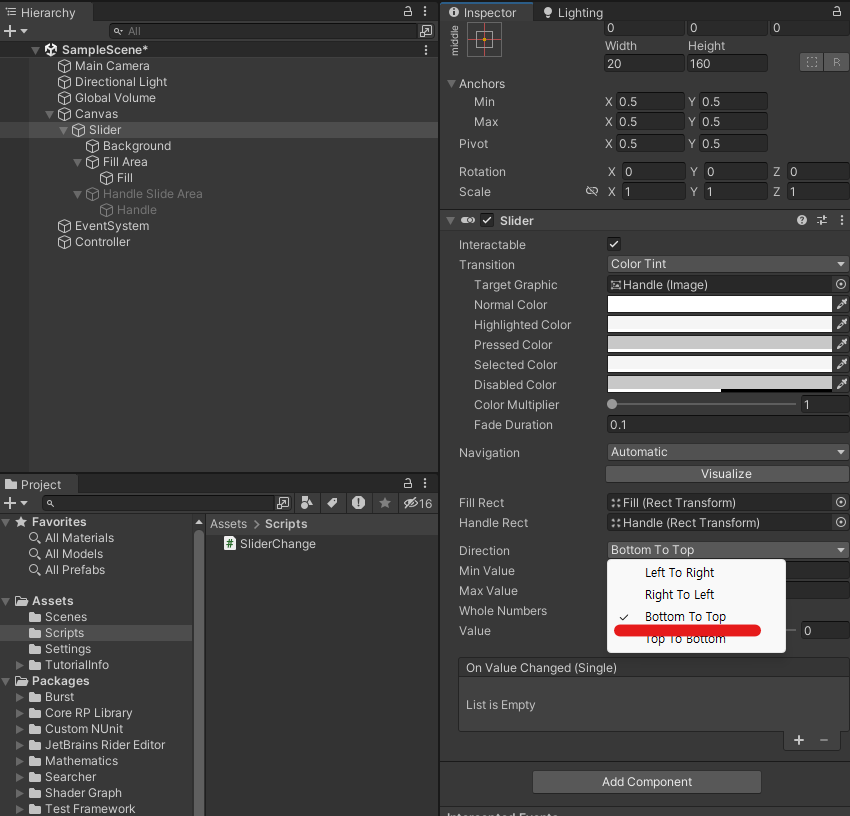
Slider의 Inpector에서 [Direction]을 [Bottom To Top]으로 바꾸면 슬라이더가 세로로 세워진다.
Slider를 3개 만들어서 각각의 랜덤 값을 적용해본다.
using System.Collections;
using System.Collections.Generic;
using UnityEngine;
using UnityEngine.UI;

public class SliderChange : MonoBehaviour
{
    public Slider slider;
    public Slider slider1;
    public Slider slider2;
    void Start()
    {
        InvokeRepeating("RandomValue", 0.1f, 0.1f); //함수 이름, 1초마다 반복하고, 1초 뒤에 반복한다.
    }

    public void RandomValue()
    {
        slider.value = Random.Range(0.6f, 0.8f);
        slider1.value = Random.Range(0.1f, 0.9f);
        slider2.value = Random.Range(0f, 1f);
    }
}
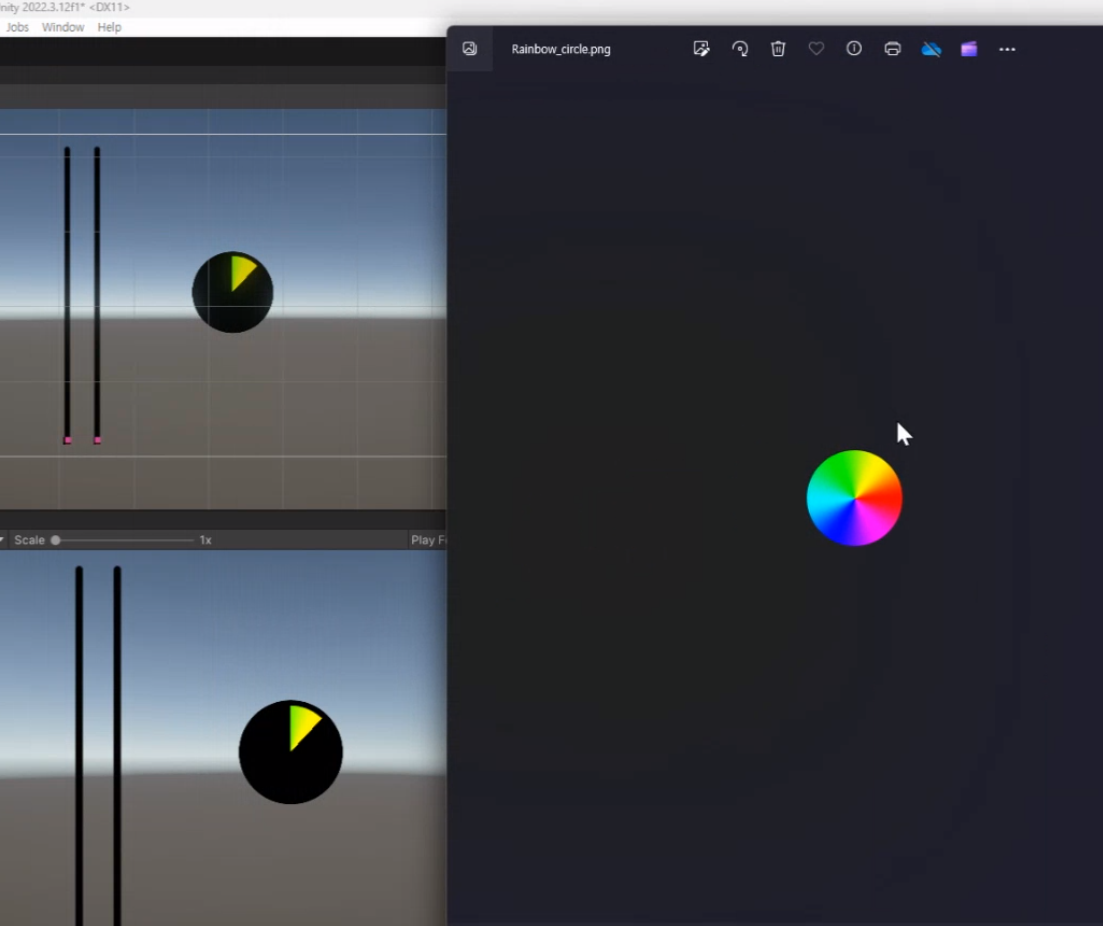
Circle Slider

세 객체를 잡고 스트레치
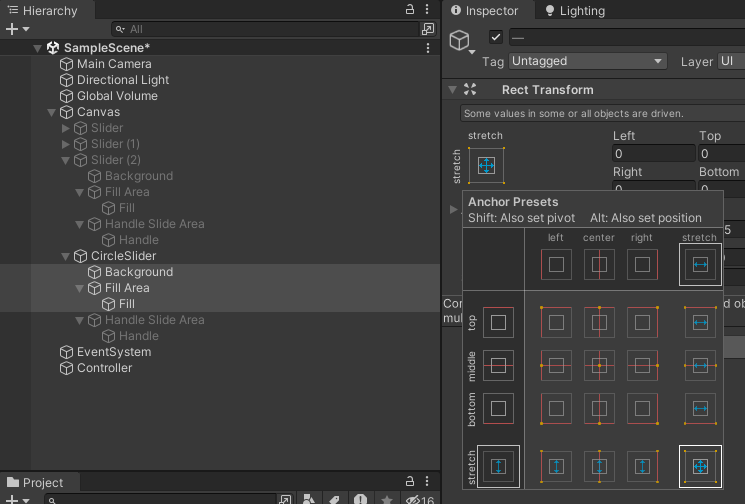
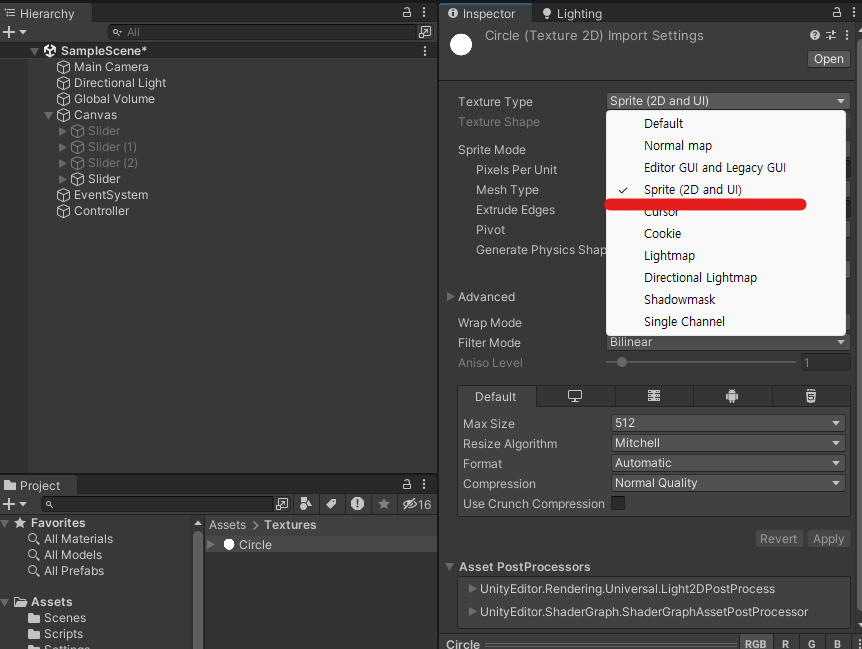
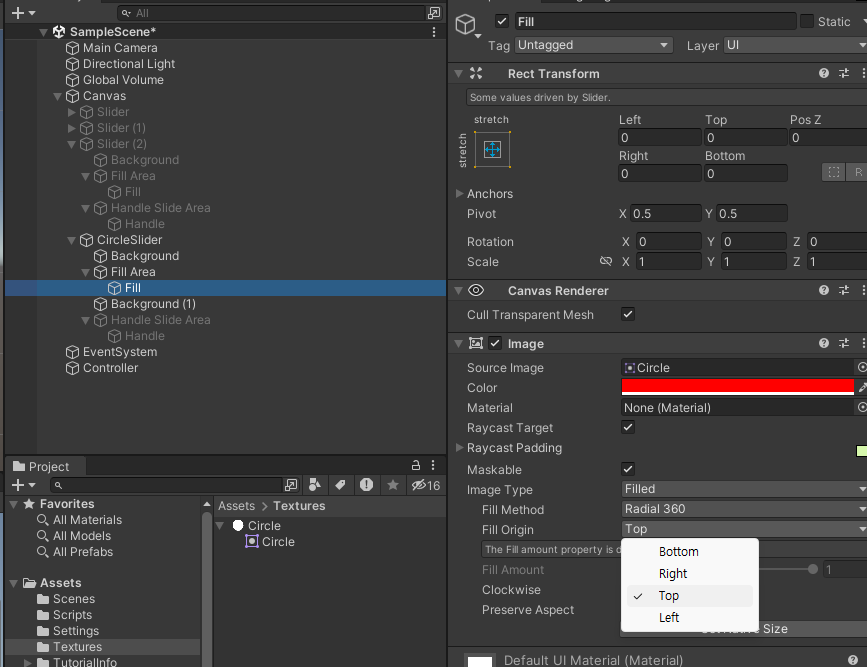
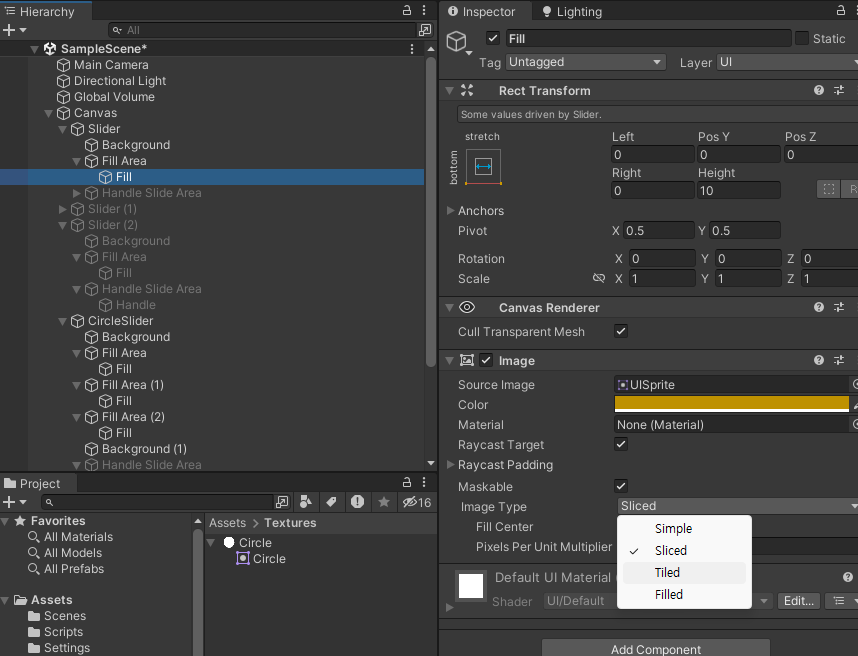
Background와 Fill에 원 이미지를 넣는다.
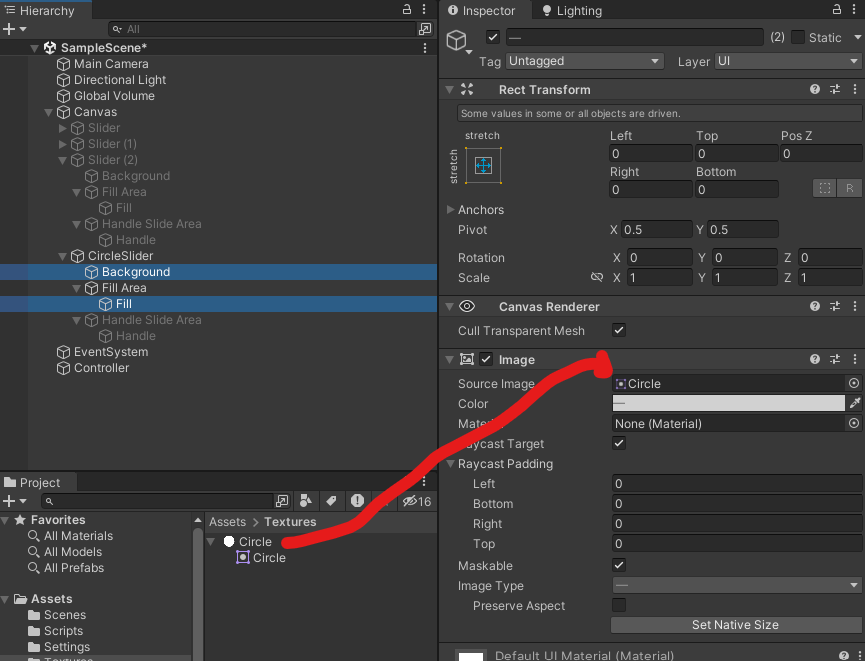
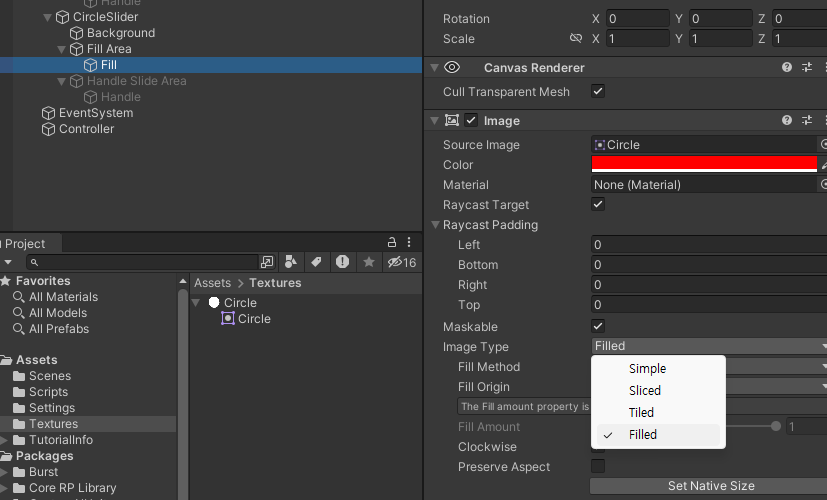
Fill의 [Image Type]은 [Filled]로 바꾼다.
앞에 배경을 하나 더 복사해서 넣으면 좀 더 그럴 듯 해진다.
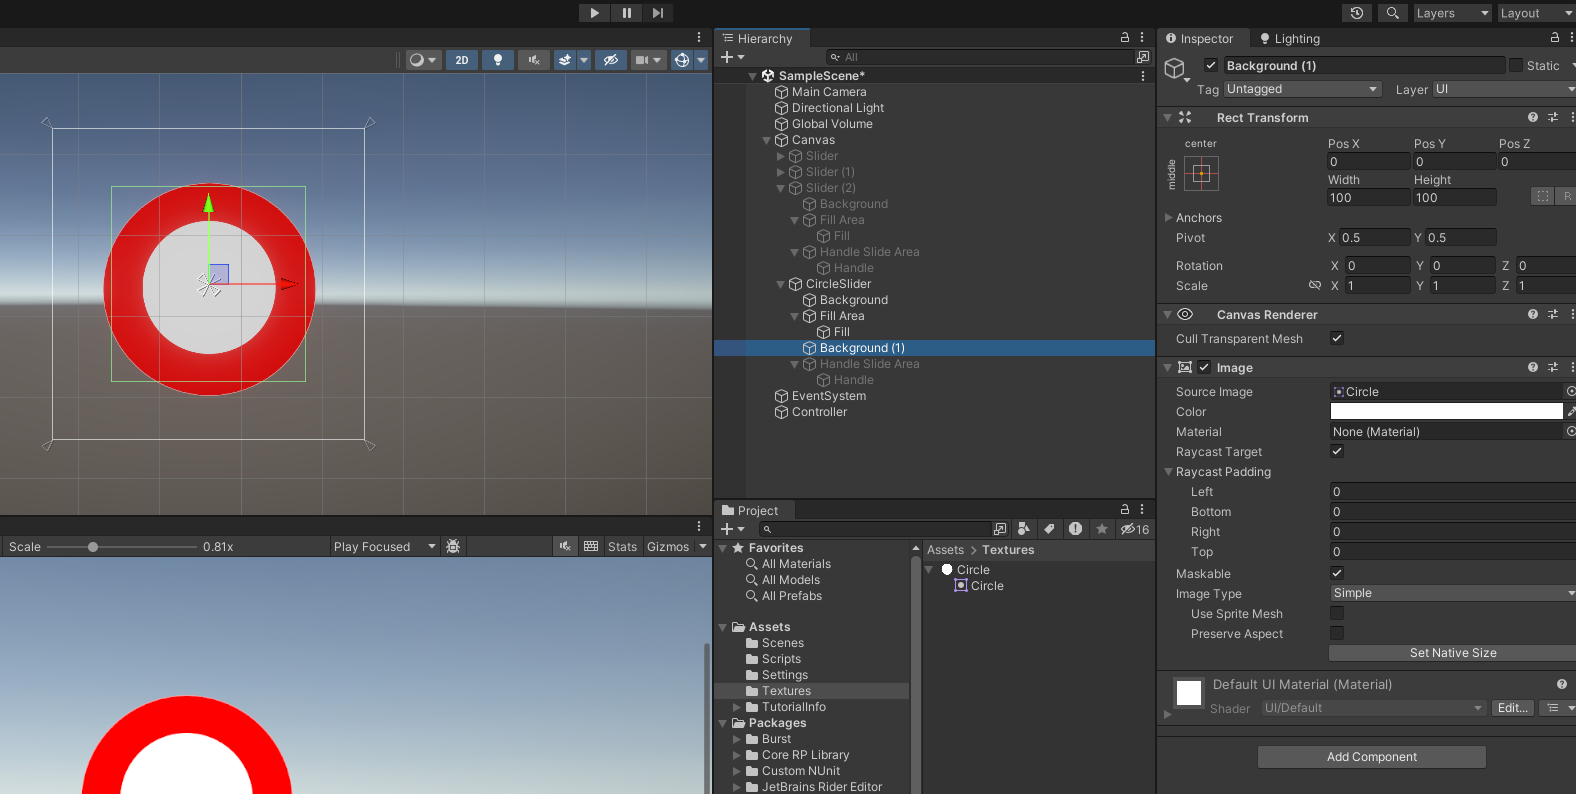
*전체 스트레치와 가운데 피봇을 잘 이용한다. ex) 틀어져 있는 객체에게 전체 스트레치 잡아서 가운데 동심원을 맞춘 후 다시 피봇을 바꿔 가운데에만 주고 Width와 Height를 바꾸면 동심원에 지름만 작아진다.
위의 gif에서는 아래를 기준으로 움직이는데, 이것을 바꾸고 싶다면 Fill 객체에서 [Fill Origin]을 Bottom에서 Top으로 바꾼다.
마찬가지로 랜덤성을 부여하면 랜덤으로 움직인다.
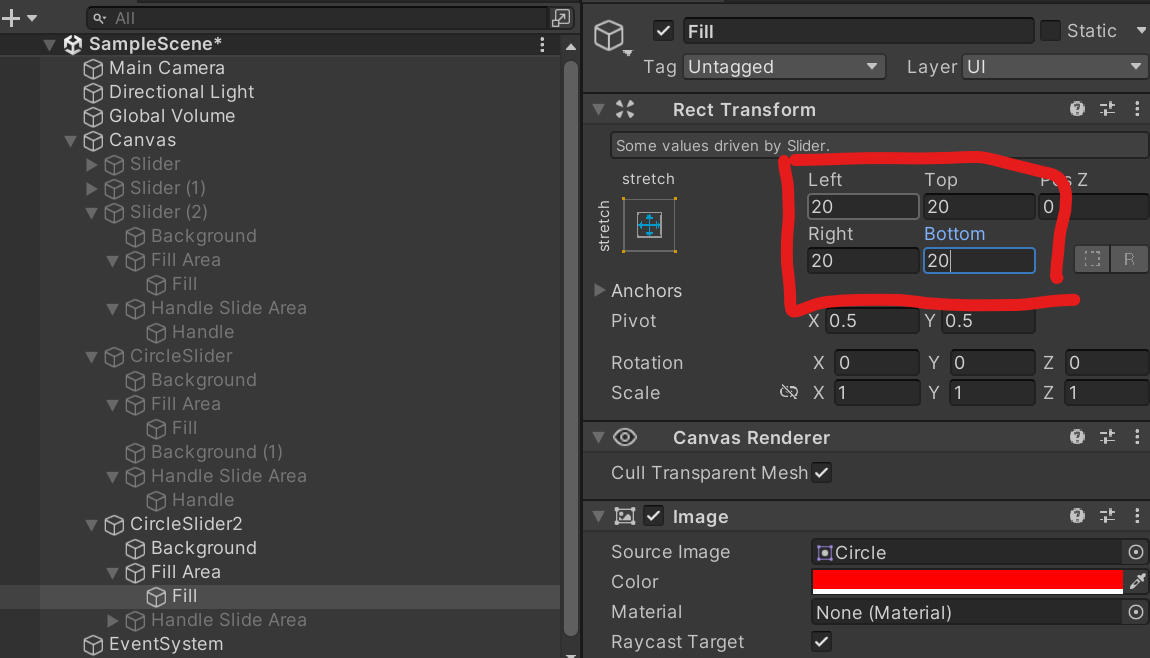
**혹시 정렬이 잘 안된다면, 세 개를 잡아서 스트레치하고 Fill의 Left, Top, Right, Bottom 값으로 padding을 주거나, Background의 Width와 Height로 지름을 늘려서 배경을 보이게 만든다.
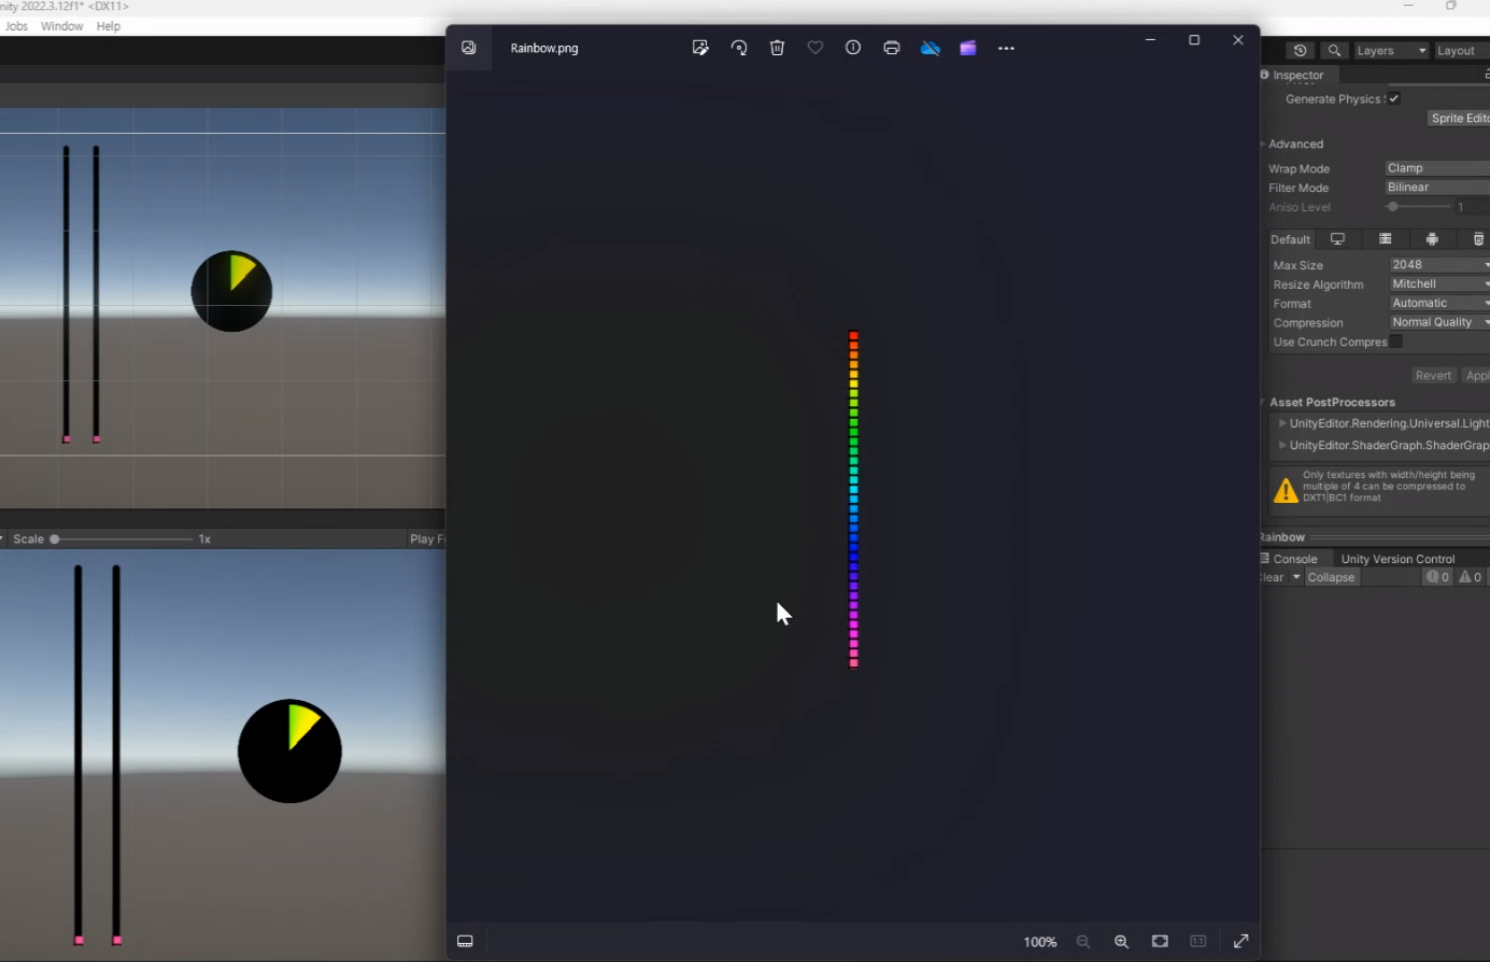
***레인보우 원을 적용하면 예쁘게 보일 수 있다.
****막대 그래프 Tiled로 바꿔서 레인보우 이미지를 적용하면 예쁘게 보인다.
슬라이더 부드럽게 움직이게 하기
랜덤 값에 따라 슬라이더가 많이 튀어서 부드럽게 움직이는 코드를 만들어서 적용해보았다.
using System.Collections;
using System.Collections.Generic;
using UnityEngine;
using UnityEngine.UI;

public class SliderSmooth : MonoBehaviour
{
    public Slider slider;
    public Slider slider1;
    public Slider slider2;

    public float smoothness = 0.1f; // 부드러운 이동을 위한 정도

    void Start()
    {
        StartCoroutine(RandomSmoothValue());
    }

    IEnumerator RandomSmoothValue()
    {
        while (true)
        {
            float targetValue = Random.Range(0.6f, 0.8f);
            StartCoroutine(LerpSliderValue(slider, targetValue));

            targetValue = Random.Range(0.1f, 0.9f);
            StartCoroutine(LerpSliderValue(slider1, targetValue));

            targetValue = Random.Range(0f, 1f);
            StartCoroutine(LerpSliderValue(slider2, targetValue));

            yield return new WaitForSeconds(smoothness);
        }
    }

    IEnumerator LerpSliderValue(Slider targetSlider, float targetValue)
    {
        float elapsedTime = 0f;
        float startValue = targetSlider.value;

        while (elapsedTime < smoothness)
        {
            targetSlider.value = Mathf.Lerp(startValue, targetValue, elapsedTime / smoothness);
            elapsedTime += Time.deltaTime;
            yield return null;
        }

        targetSlider.value = targetValue; // 최종 값 설정
    }
}
유니티 UI -표그리기
https://assetstore.unity.com/packages/tools/gui/simple-tableui-170718
Simple TableUI | GUI 도구 | Unity Asset Store
Use the Simple TableUI from Adrian Bouza on your next project. Find this GUI tool & more on the Unity Asset Store.
assetstore.unity.com
표를 그리기 위해서 위의 에셋을 다운로드 받고 오류가 뜨는 문구 중 "_HorizontalAlignmentOptions" 이름을 앞에 언더스코어가 빠진 " HorizontalAlignmentOptions" 이름으로 바꾼다.
UI 메뉴에서 [Table]을 생성할 수 있게 되었다.
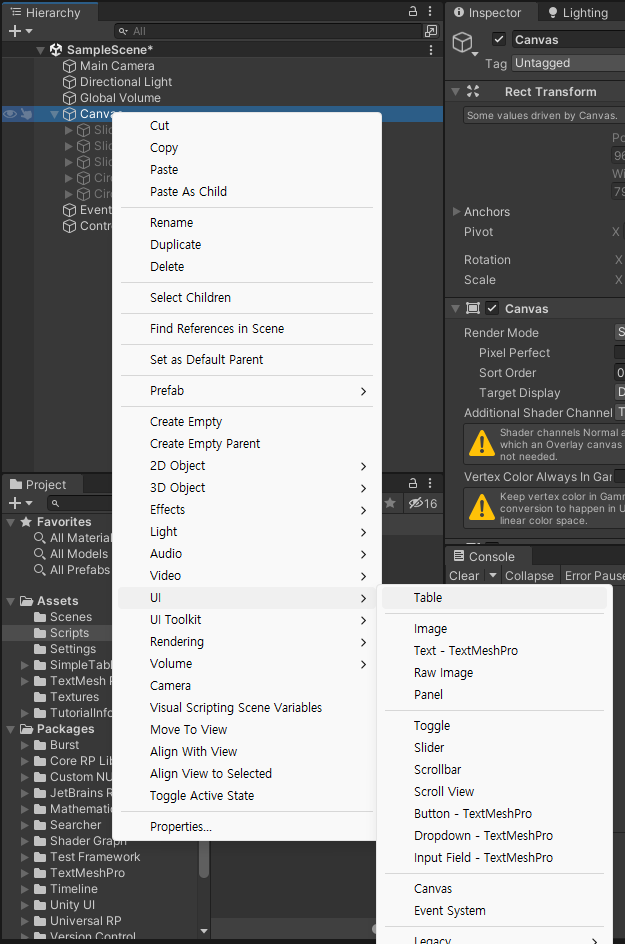
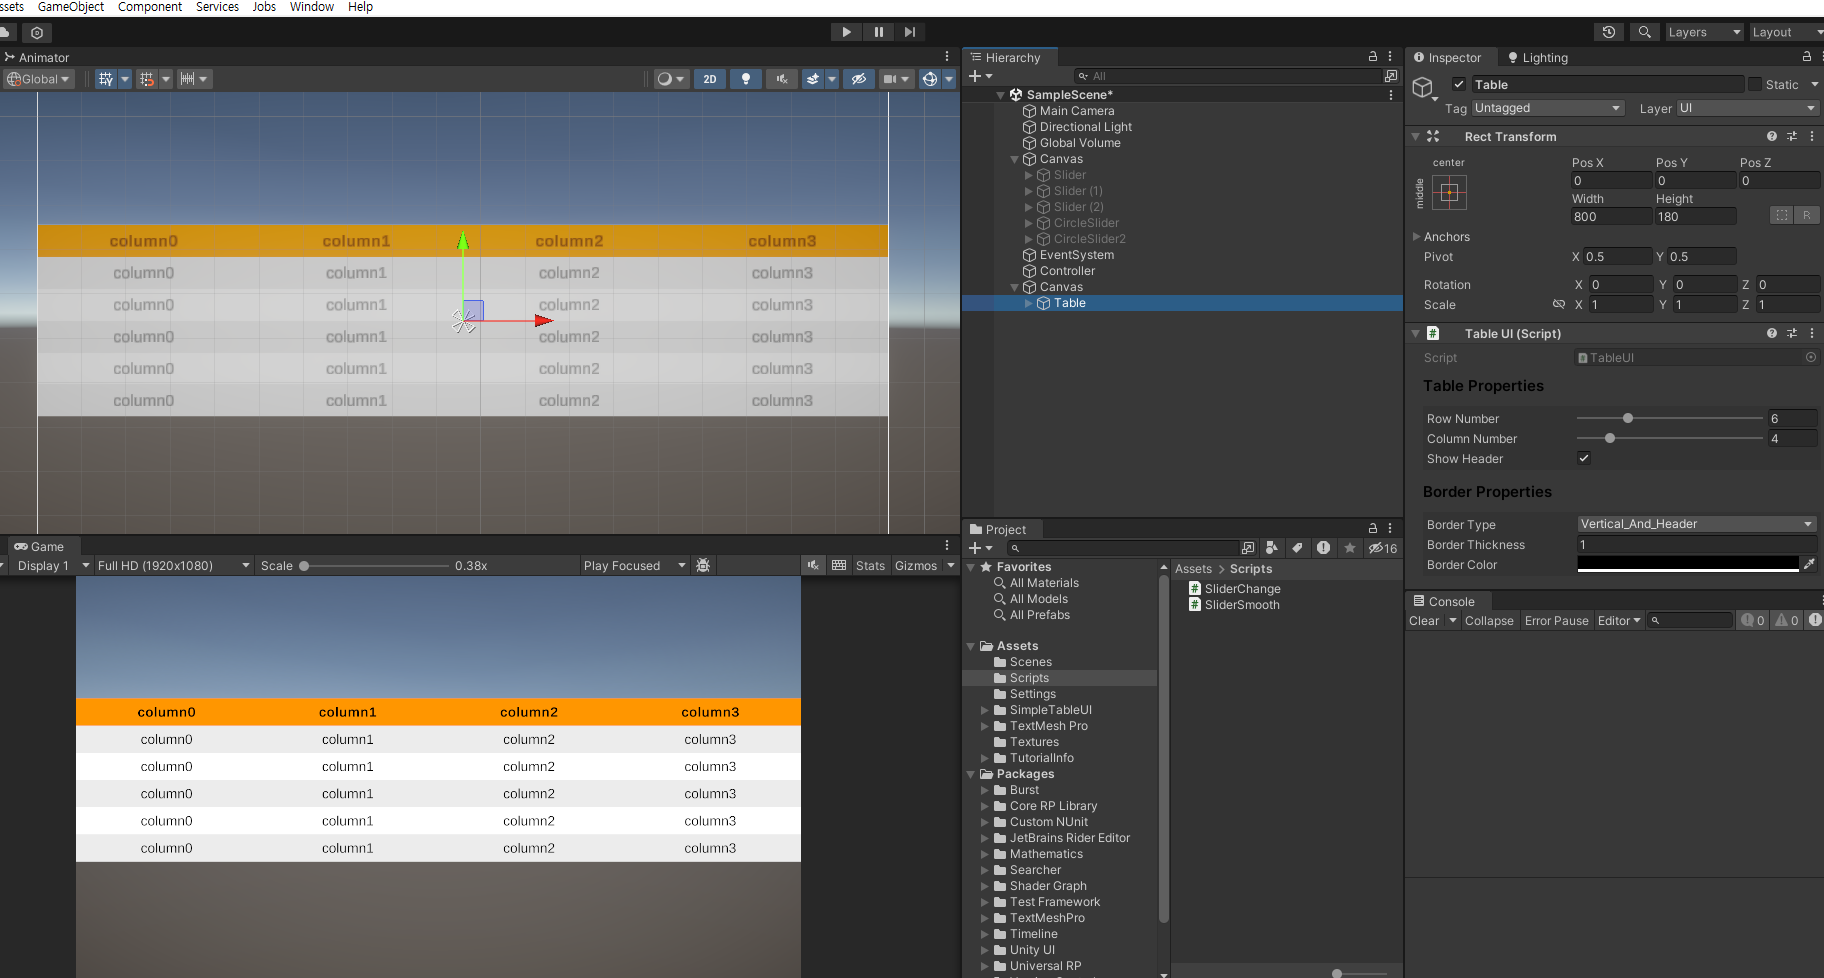
생성하면, 표가 불러와진다.
TableChange 스크립트 생성
using System.Collections;
using System.Collections.Generic;
using UnityEngine;
using UnityEngine.UI;
using TMPro;

public class TableChange : MonoBehaviour
{
    public Transform rowCellTransform;

    private void Start()
    {
        InvokeRepeating("UpdateRandomValue", 1.0f, 1.0f);
    }

    void UpdateRandomValue()
    {
        TextMeshProUGUI[] textComponents = rowCellTransform.GetComponentsInChildren<TextMeshProUGUI>();

        foreach(var textComponent in textComponents)
        {
            textComponent.text = Random.Range(1, 101).ToString();
        }
    }
}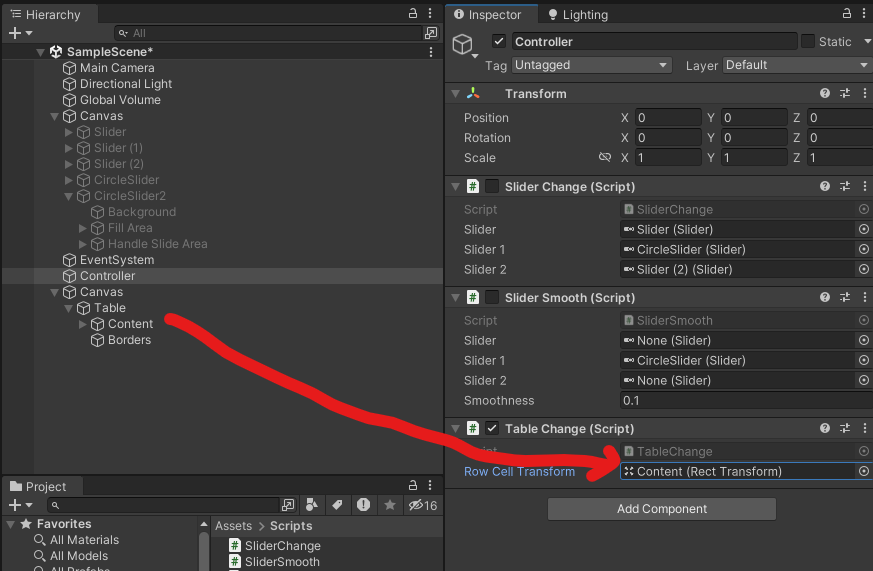
숫자들이 랜덤으로 바뀌는 것을 볼 수 있다.
첫 번째 Row만 바꾸기
TableChange 스크립트 수정
using System.Collections;
using System.Collections.Generic;
using UnityEngine;
using UnityEngine.UI;
using TMPro;

public class TableChange : MonoBehaviour
{
    public Transform rowCellTransform;

    private void Start()
    {
        InvokeRepeating("UpdateRandomValue", 1.0f, 1.0f);
    }

    void UpdateRandomValue()
    {
        Transform rowChild = rowCellTransform.Find("row0");
        TextMeshProUGUI[] textComponents = rowChild.GetComponentsInChildren<TextMeshProUGUI>();
        //TextMeshProUGUI[] textComponents = rowCellTransform.GetComponentsInChildren<TextMeshProUGUI>();

        foreach(var textComponent in textComponents)
        {
            textComponent.text = Random.Range(1, 101).ToString();
        }
    }
}
"row0" 이름을 가진 맨 윗줄만 바뀌는 것을 볼 수 있다.
유니티 UI -그래프
https://github.com/XCharts-Team/XCharts.git
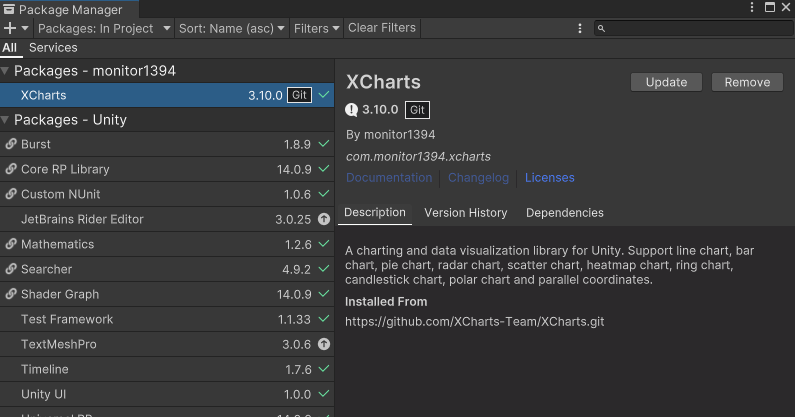
유니티 패키지 매니저에서 XChart를 git 링크로 설치한다.
설치하면 [XCharts] 탭이 생기고, 차트를 넣을 수 있게 된다.
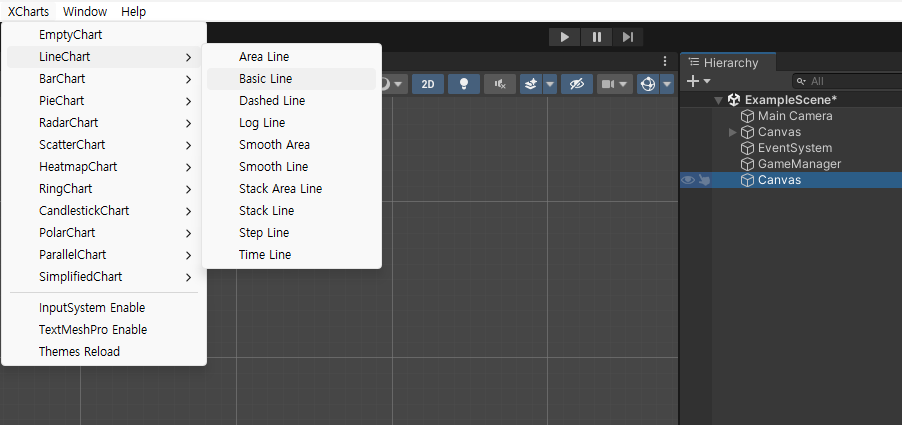
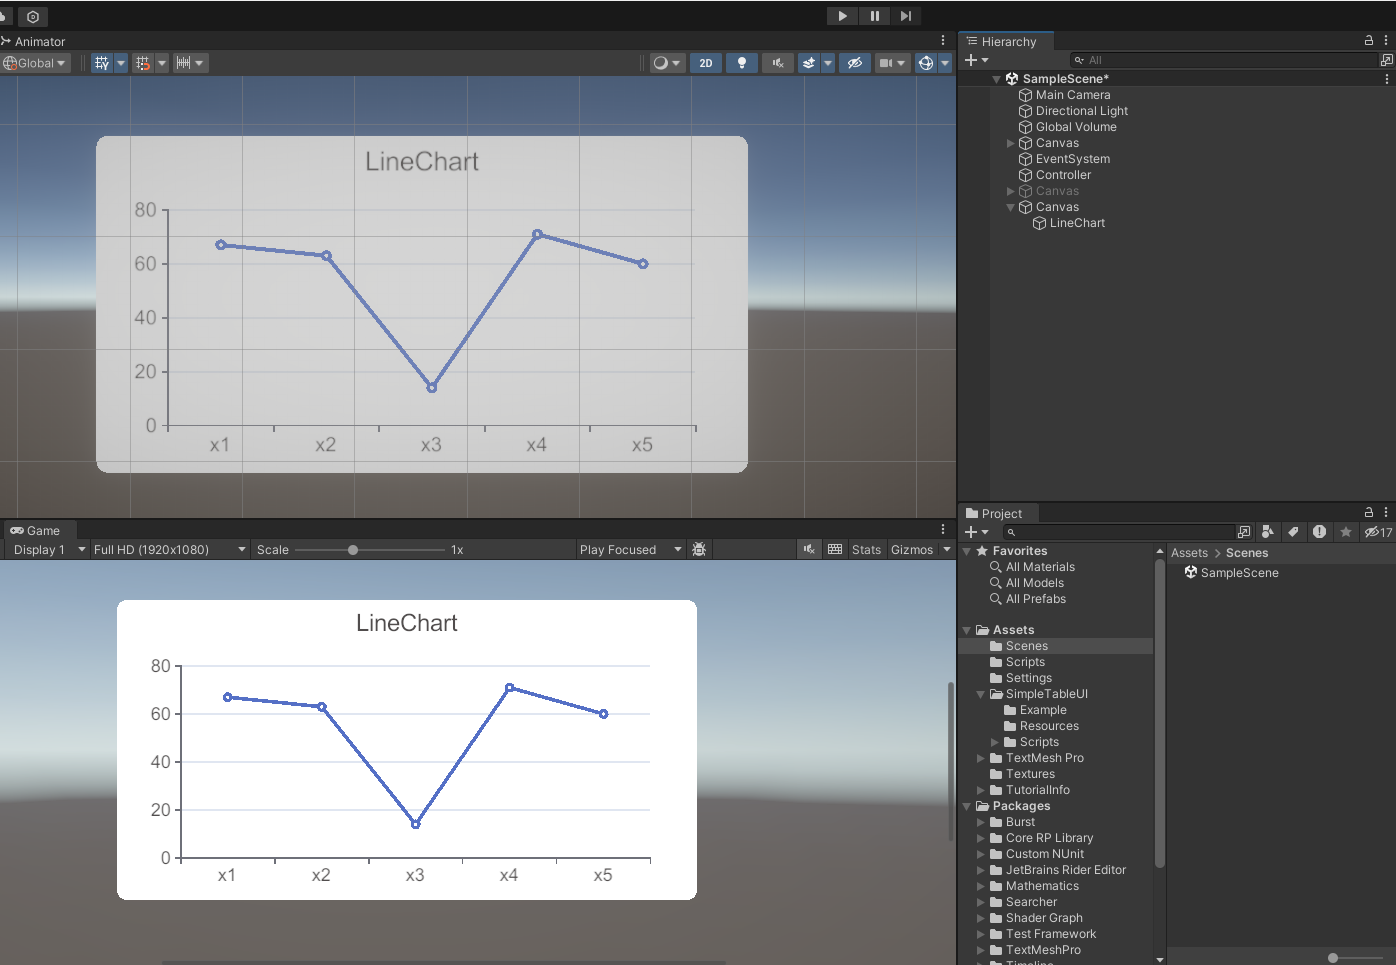
LineChart를 불러오면 아래의 예시를 볼 수 있다.
XChart 스크립트 생성
using System.Collections;
using System.Collections.Generic;
using UnityEngine;
using XCharts.Runtime;

public class XChart : MonoBehaviour
{
    private void Start()
    {
        var xchart = gameObject.GetComponent<LineChart>();
        if(xchart == null)
        {
            xchart = gameObject.AddComponent<LineChart>();
            xchart.Init();
        }
        xchart.SetSize(300, 400);
    }
}
스크립트를 LineChart에 직접 넣고 실행하면 차트의 크기가 바뀌는 것을 볼 수 있다.
툴팁, 범례 보기
using System.Collections;
using System.Collections.Generic;
using UnityEngine;
using XCharts.Runtime;

public class XChart : MonoBehaviour
{
    private void Start()
    {
        var xchart = gameObject.GetComponent<LineChart>();
        if(xchart == null)
        {
            xchart = gameObject.AddComponent<LineChart>();
            xchart.Init();
        }
        xchart.SetSize(300, 400);

        var tooltip = xchart.EnsureChartComponent<Tooltip>();
        tooltip.show = true;

        var legend = xchart.EnsureChartComponent<Legend>();
        legend.show = true;
    }
}
그래프에 데이터 추가
using System.Collections;
using System.Collections.Generic;
using UnityEngine;
using XCharts.Runtime;

public class XChart : MonoBehaviour
{
    private void Start()
    {
        var xchart = gameObject.GetComponent<LineChart>();
        if(xchart == null)
        {
            xchart = gameObject.AddComponent<LineChart>();
            xchart.Init();
        }
        xchart.SetSize(600, 400);

        var tooltip = xchart.EnsureChartComponent<Tooltip>();
        tooltip.show = true;

        var legend = xchart.EnsureChartComponent<Legend>();
        legend.show = true;

        for(int i = 0; i < 10; i++)
        {
            xchart.AddXAxisData("x" + i);
            xchart.AddData(0, Random.Range(10, 20));
        }
    }
}
Inspector 상의 수 많은 세팅 값 중에서, [Align With Label]을 체크하면 X축의 틱이 데이터 값과 잘 맞는다. [Split Number]는 아래 X 축의 기준 label들을 몇 개 표시해줄 지 정할 수 있다.

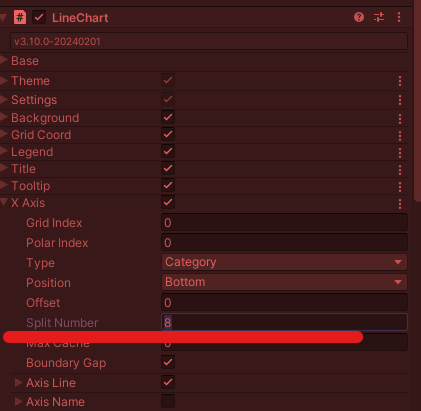
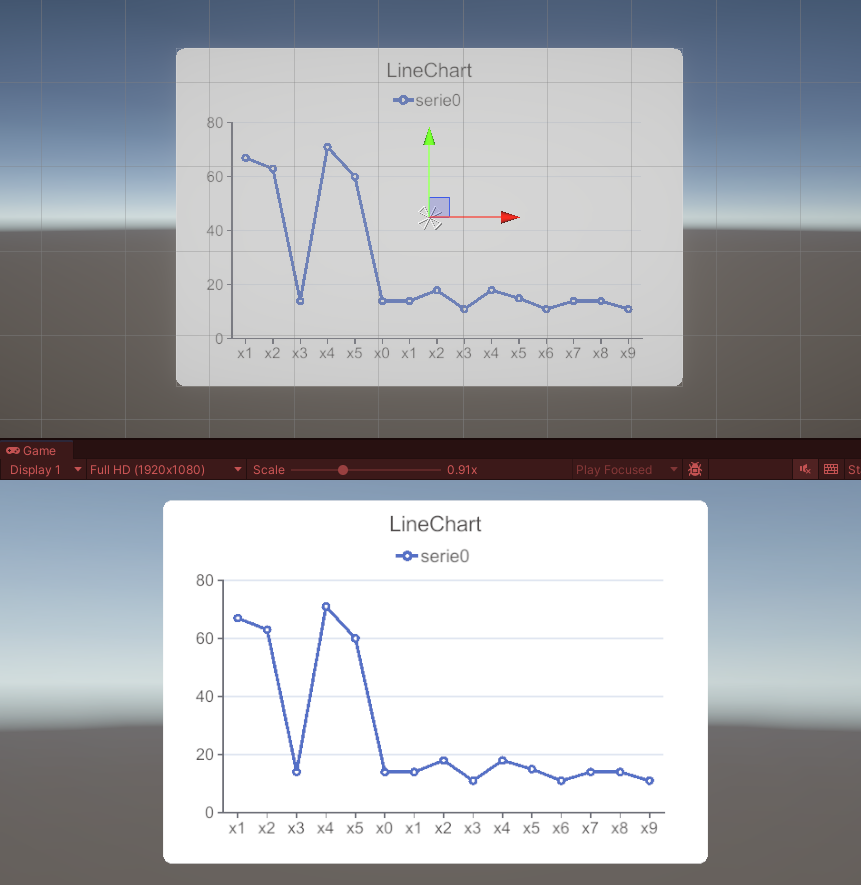
데이터들과 X축 Tick과 Label이 잘 맞는 것을 볼 수 있다.
*Tutorial을 보면서 필요한 기능을 구현하면 된다.
https://github.com/XCharts-Team/XCharts/blob/master/Documentation~/en/tutorial01.md
'SKKU DT' 카테고리의 다른 글
| [SKKU DT] 68일차 -유니티 Rest API 활용하기(뉴스 기사, 주식 정보), Shader Graph(셰이더 그래프) (1) | 2024.02.06 |
|---|---|
| [SKKU DT] 67일차 -유니티 Rest API 활용하기(날씨, 정보, 사진) (1) | 2024.02.05 |
| [SKKU DT] 65일차 -유니티에서 ChatGPT Api 가져오기 (0) | 2024.02.01 |
| [SKKU DT] 63일차 -Stable Diffusion과 기능들 (2) | 2024.01.30 |
| [SKKU DT] 62일차 -AI 알아보기, 기업 특강, 챗봇 생성하기, 블렌더 스크립트 생성 (0) | 2024.01.29 |